本系列主要是觉得自己对于python语言没有java那么熟悉,借着2025暑期的充裕时间,打算好好详细学习下机器学习、深度学习等。所以第一步就是把python语言的基础打好。
python是什么
python是由Guido van Rossum创造,1989年首次发布。对于不会编程的小伙伴来说,python无疑是快速上手的最佳编程语言。如今AI(特别是大模型)处于风口,python也因此非常热门。除了AI领域(机器学习,深度学习,大模型等等),AI还在爬虫、数据科学、办公自动化、自动化运维、量化交易、数据挖掘、推荐算法、搜索算法等领域应用颇多。
python虽然在网站开发、游戏开发应用并不是很多,但是也有比较完善的生态。
python是一门解释型语言,这点与java,cpp都不同,可以简单理解为:python是执行一行输出一行的。同样是解释型语言的还有javascript。
python与java一样,属于面向对象的编程语言。在python中,万事万物皆对象。
python开发环境的搭建
关于python解释器的下载、Jupyter notebook、pycharm等等的下载网上教程颇多,不再赘述。此处记录一些个人个性化配置的内容,便于翻阅调整。
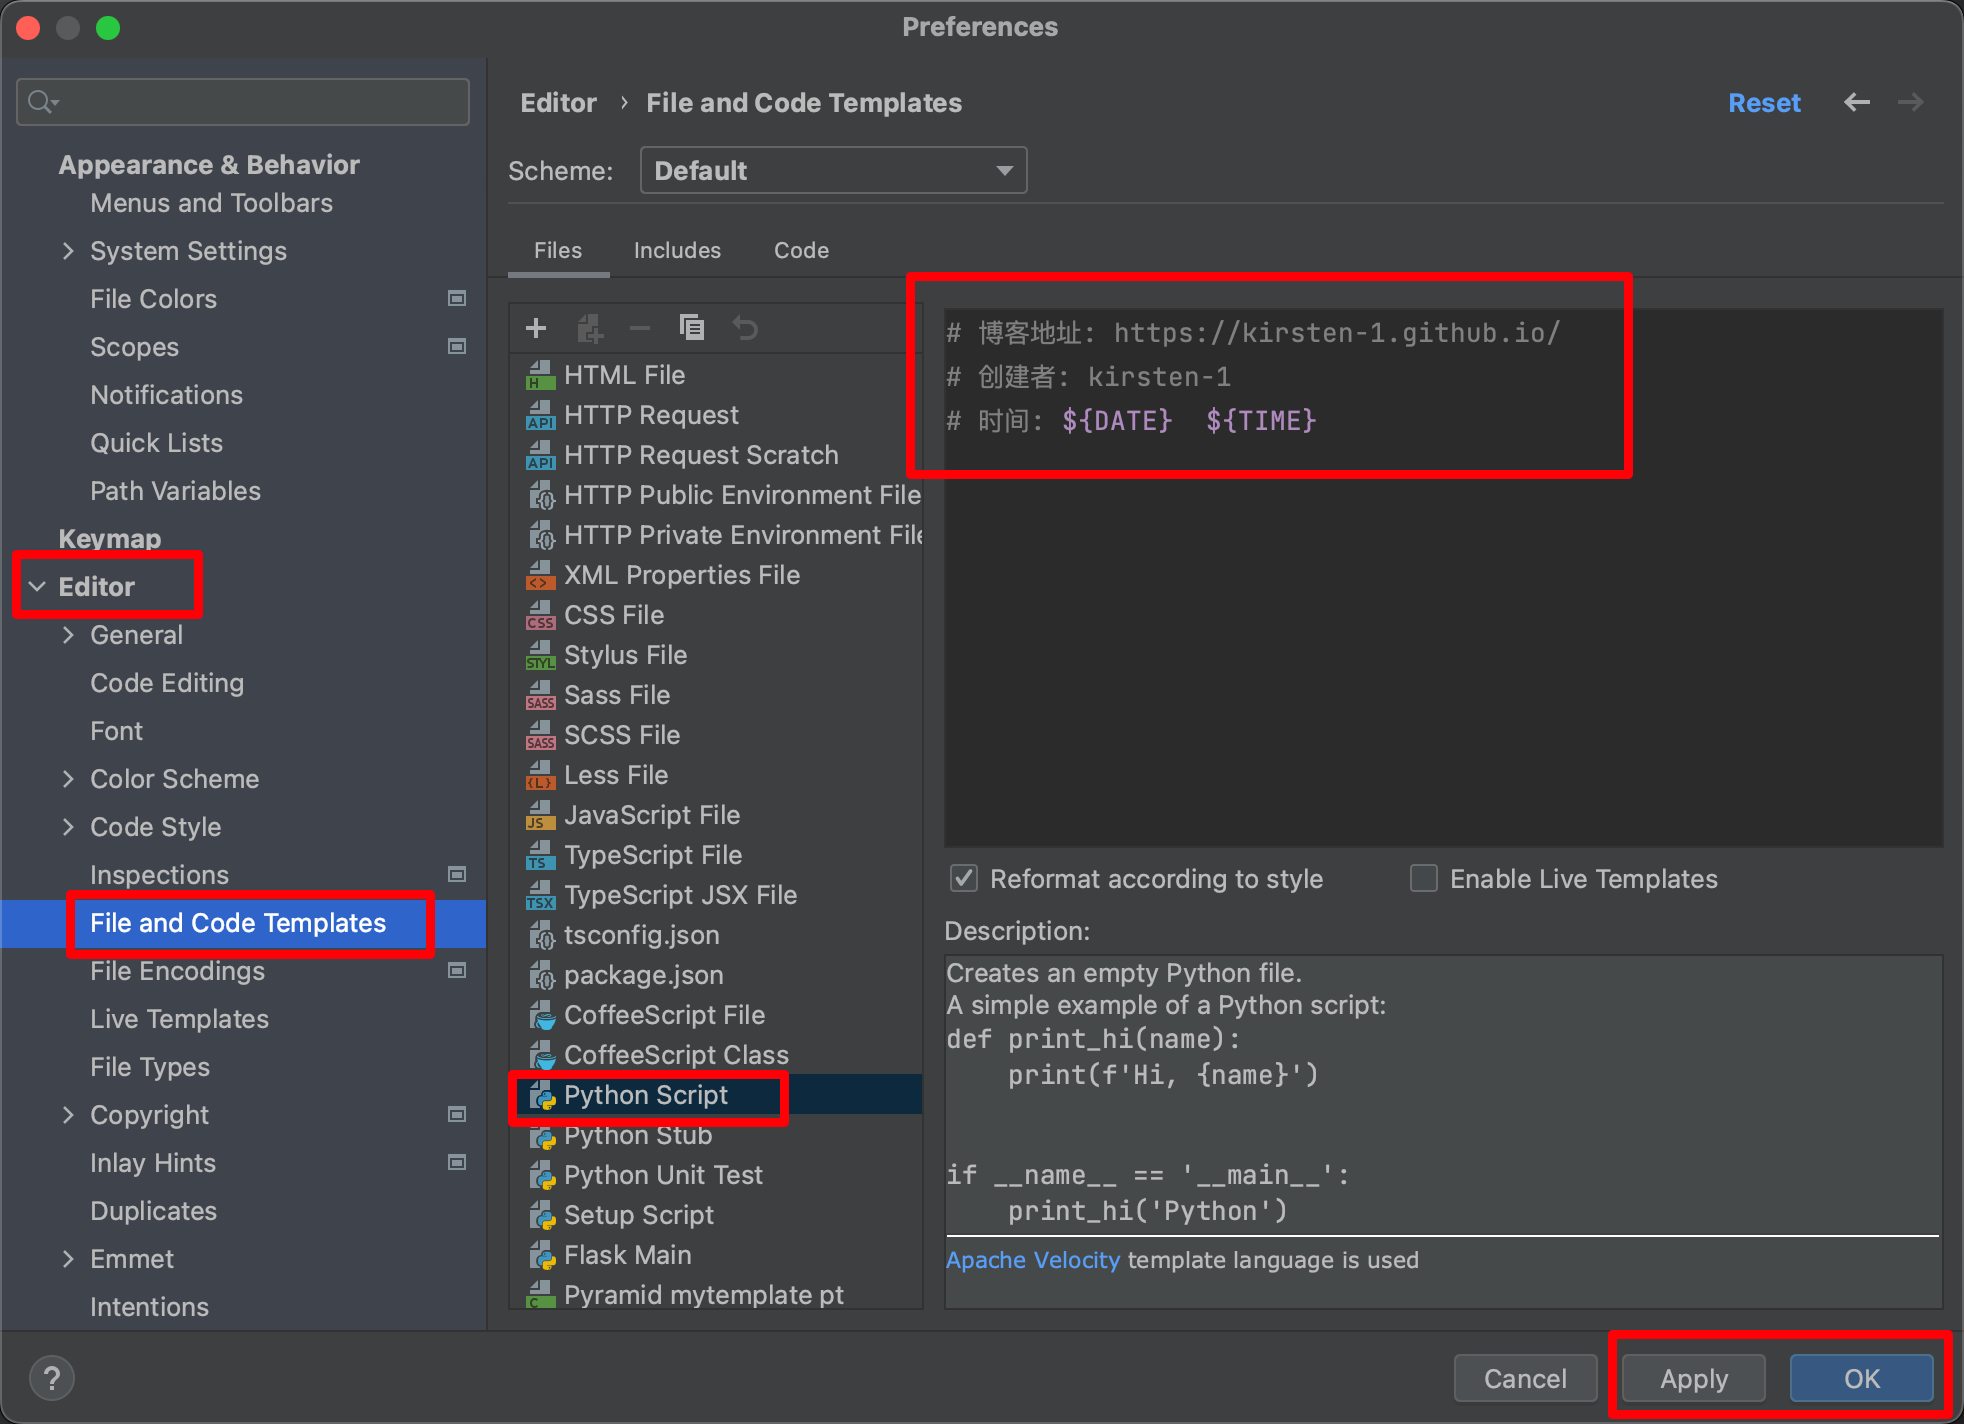
首先在pycharm中如果想要每次创建一个python文件都有时间、创建者等模版信息,需要在下面内容中调整:
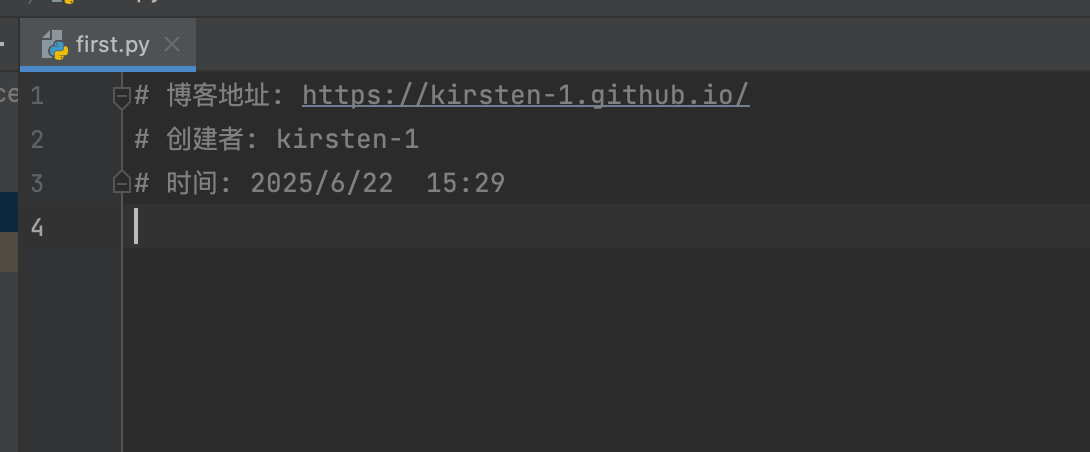
效果就是这样:
python的输出函数print()
-
print函数能输出什么?
- 数字、字符串、表达式
-
print函数能输出到哪里?
-
显示器(控制台/终端)
-
文件
-
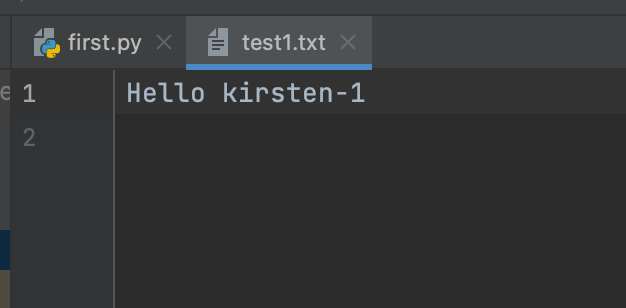
1
2
3
4
# 输出到文件
# a+:如果文件不存在,创建文件, 如果文件存在,那么追加(原先有的内容不会删除)
fp = open("/Users/apple/Documents/PythonWorkSpace/PythonBasicWorkSpace/PythonProject01/test1.txt", "a+")
print("Hello kirsten-1", file=fp)
-
执行结果:
-
-
-
换行输出与不换行输出?
-
上面都是换行输出,下面是不换行输出:
-
1
  print("111", "123", "你好")
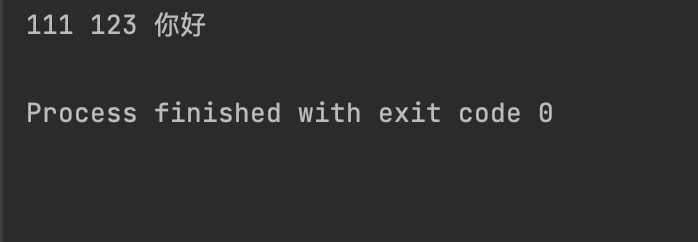
-
转义字符和原字符
转义字符(Escape Characters)是以反斜杠 \ 开头的特殊字符序列,用于表示某些无法直接输入或显示的字符(如换行、制表符)或对特殊字符(如引号)进行转义处理。转义字符在字符串中起到特殊作用,广泛用于格式化输出、文件处理和正则表达式等场景。
python中的转义字符有很多,比如:
\n:换行
\t:制表符,这个看下面图需要详细了解
以4个为一组,如果前面不满4个,那么就留出几个空格,满了4个就留出4个空格。
比如下面代码:
1
2
print("hello\tworld")
print("helloooo\tworld")
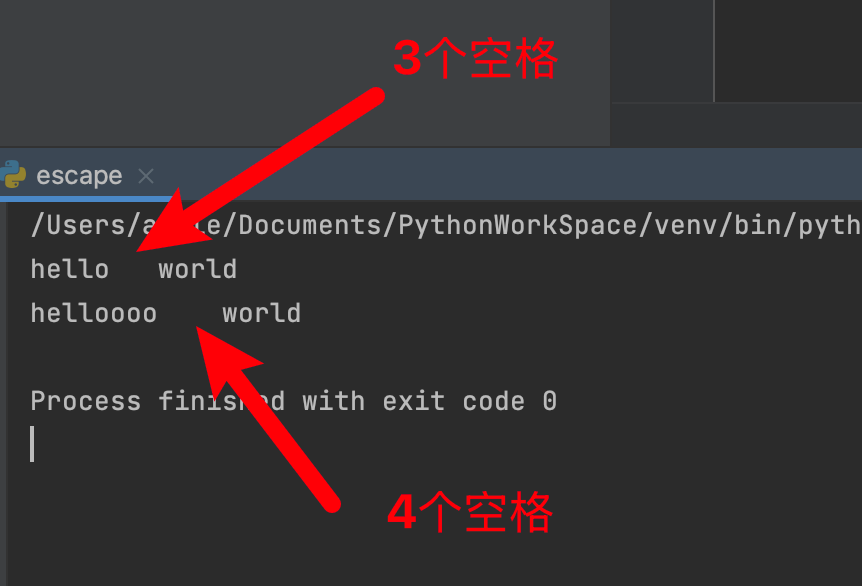
如何理解这个结果?这个图清楚的解释了:

通常4 或 8 个空格(具体取决于环境)。上面是4个空格为一个单位。
\b:back,表示回退一个。
1
print("Hello\bworld")  # 输出Hellworld
输出结果少了一个o,就是回退了一个位置
\r:将光标移到当前行的开头,覆盖之前的输出(常用于 Windows 文本文件的换行 \r\n)。
1
print("Hello\rworld")   # 输出world
\\:相当于\,比如:
1
print("http:\\\\www.baidu.com")   # 输出http:\\www.baidu.com
下面两个同理。
\'
\"
如果希望引号中的内容原样输出,不要转义,那么可以这么写:
1
2
print(r"http:\\\\www.baidu.com")   # 输出http:\\\\www.baidu.com
print(R"http:\\\\www.baidu.com")   # 输出http:\\\\www.baidu.com
但是要注意上面这么写不能引号中\(单个的反斜杠)结尾,不然会报错:

因为如果字符串以 \ 结束,解析器会认为 \ 正在转义下一个字符(即使是原始字符串)。在原始字符串中,\ 虽然不触发转义,但语法解析器在扫描引号前仍会检查 \ 是否合法。当 \ 后直接跟结束引号(如 r”abc"),解析器认为 \ 试图转义 “,但在原始字符串中," 不是合法的转义序列,导致语法错误。
如果需要在原始字符串中表示以单个反斜杠 \ 结尾的内容,那么用两个\就可以,即\\,或者写完\之后添加一个空格。
即:
1
2
print(R"http:\\\\www.baidu.com\ ")   # 输出http:\\\\www.baidu.com
print(R"http:\\\\www.baidu.com\\")   # 输出http:\\\\www.baidu.com
小任务1
任务1:向文件输出‘奋斗成就更好的你‘
1
2
fp = open("/Users/apple/Documents/PythonWorkSpace/PythonBasicWorkSpace/PythonProject01/task1.txt", "a+")
print("奋斗成就更好的你", file=fp)
效果:

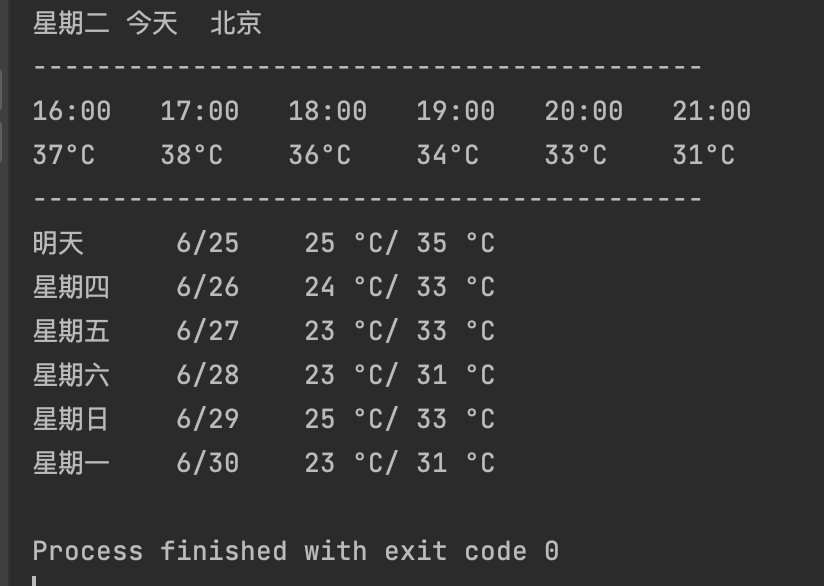
任务2:输出北京天气预报
要求:
可以去https://dev.qweather.com/注册,然后创建项目和项目的凭据,得到API Key
另外需要记录自己的API_host:在https://console.qweather.com/setting链接中查看,格式类似于abcxyz.qweatherapi.com
然后书写代码进行简单的测试:(下面代码中需要自己填写API_host和api_key两个参数)
1
2
3
4
5
6
7
8
9
10
11
12
13
14
15
16
17
18
19
20
21
22
23
24
25
26
27
28
29
30
31
32
33
34
35
36
37
38
39
40
41
42
43
44
45
46
47
48
49
50
51
52
53
54
55
56
57
58
59
60
61
62
63
64
65
66
67
68
69
70
71
72
73
74
75
76
77
78
79
80
81
82
83
84
85
86
87
88
89
90
91
92
93
# 博客地址: https://kirsten-1.github.io/
# 创建者: kirsten-1
# 时间: 2025/6/24  15:09

import requests
import datetime, time
from dateutil import parser
from datetime import datetime

# 需要填写这2个参数
API_host = "XXXXXXXXXXXXXXXXXX"
api_key = "XXXXXXXXXXXXXXXXXX"

class QWEATHER:
    _geo_api = "https://" + API_host + "/v2/"
    _weather_api = "https://" + API_host + "/v7/"
    _weather_api_free = "https://" + API_host + "/v7/"

    def __init__(self, api_key):
        self.API_KEY = api_key

    def search(self, service="city", action="lookup", location="北京", coordinate="116.39,39.91", type="scenic",
               range="cn"):
        api_type = f"{service}/{action}"

        api_params_map = {
            "city/lookup": {"location": location},
            "city/top": {"range": range},
            "poi/lookup": {"location": location, "type": type},
            "poi/range": {"location": coordinate, "type": type}
        }

        if api_type not in api_params_map:
            print("跳过不支持的 API 类型", api_type)
            return None

        # 从 api_params_map 中获取对应参数
        params = api_params_map[api_type]
        url = f"{self._geo_api}{api_type}"
        response = self.http_request_v2(url, method="GET", headers=self.headers(), params=params)
        return response

    def weather(self, service="weather", period="now", locationid=None, coordinate="116.39,39.91", type=None,
                date=None):
        url = f"{self._weather_api_free}{service}/{period}"
        if service in ["historical"]:
            url = f"{self._weather_api}{service}/{period}"
        params = {"location": locationid if locationid else coordinate}
        if type:
            params['type'] = type
        if date:
            params['date'] = date
        response = self.http_request_v2(url, method="GET", headers=self.headers(), params=params)
        return response

    # 生成 headers 头
    def headers(self, params=None):
        headers = {
            'Content-Type': 'application/json',
            'X-QW-Api-Key': f'{self.API_KEY}'
        }
        return headers

    def http_request_v2(self, url, method="GET", headers={}, params=None, max_retries=2, timeout=3):
        headers = headers or {
            'User-Agent': 'Mozilla/5.0 (Windows NT 6.1; WOW64) AppleWebKit/537.36 (KHTML, like Gecko) Chrome/39.0.2171.71 Safari/537.36'}
        headers.update(self.headers())
        for attempts in range(1, max_retries + 1):
            try:
                if method == "GET":
                    response = requests.get(url, headers=headers, params=params, timeout=timeout)
                elif method in ("POST", "DELETE"):
                    response = requests.request(method, url, json=params, headers=headers, timeout=timeout)
                response.raise_for_status()
                return response.json()
            except Exception as e:
                print([datetime.datetime.now().strftime('%Y-%m-%d %H:%M:%S'), attempts, url, method, params, headers,
                       repr(e)])
                time.sleep(timeout * attempts)
        return None


if __name__ == '__main__':
    # 使用示例
    client = QWEATHER(api_key)
    # 城市天气
    # periods = ["now", "3d", "7d", "10d", "15d", "30d", "24h", "72h", "168h"]
    periods = ["now", "3d", "7d", "24h"]
    for period in periods:
        print()
        print(f" - period: {period}")
        response = client.weather(period=period, locationid='101010100')
        print(response)
测试结果:控制台输出了很多信息:
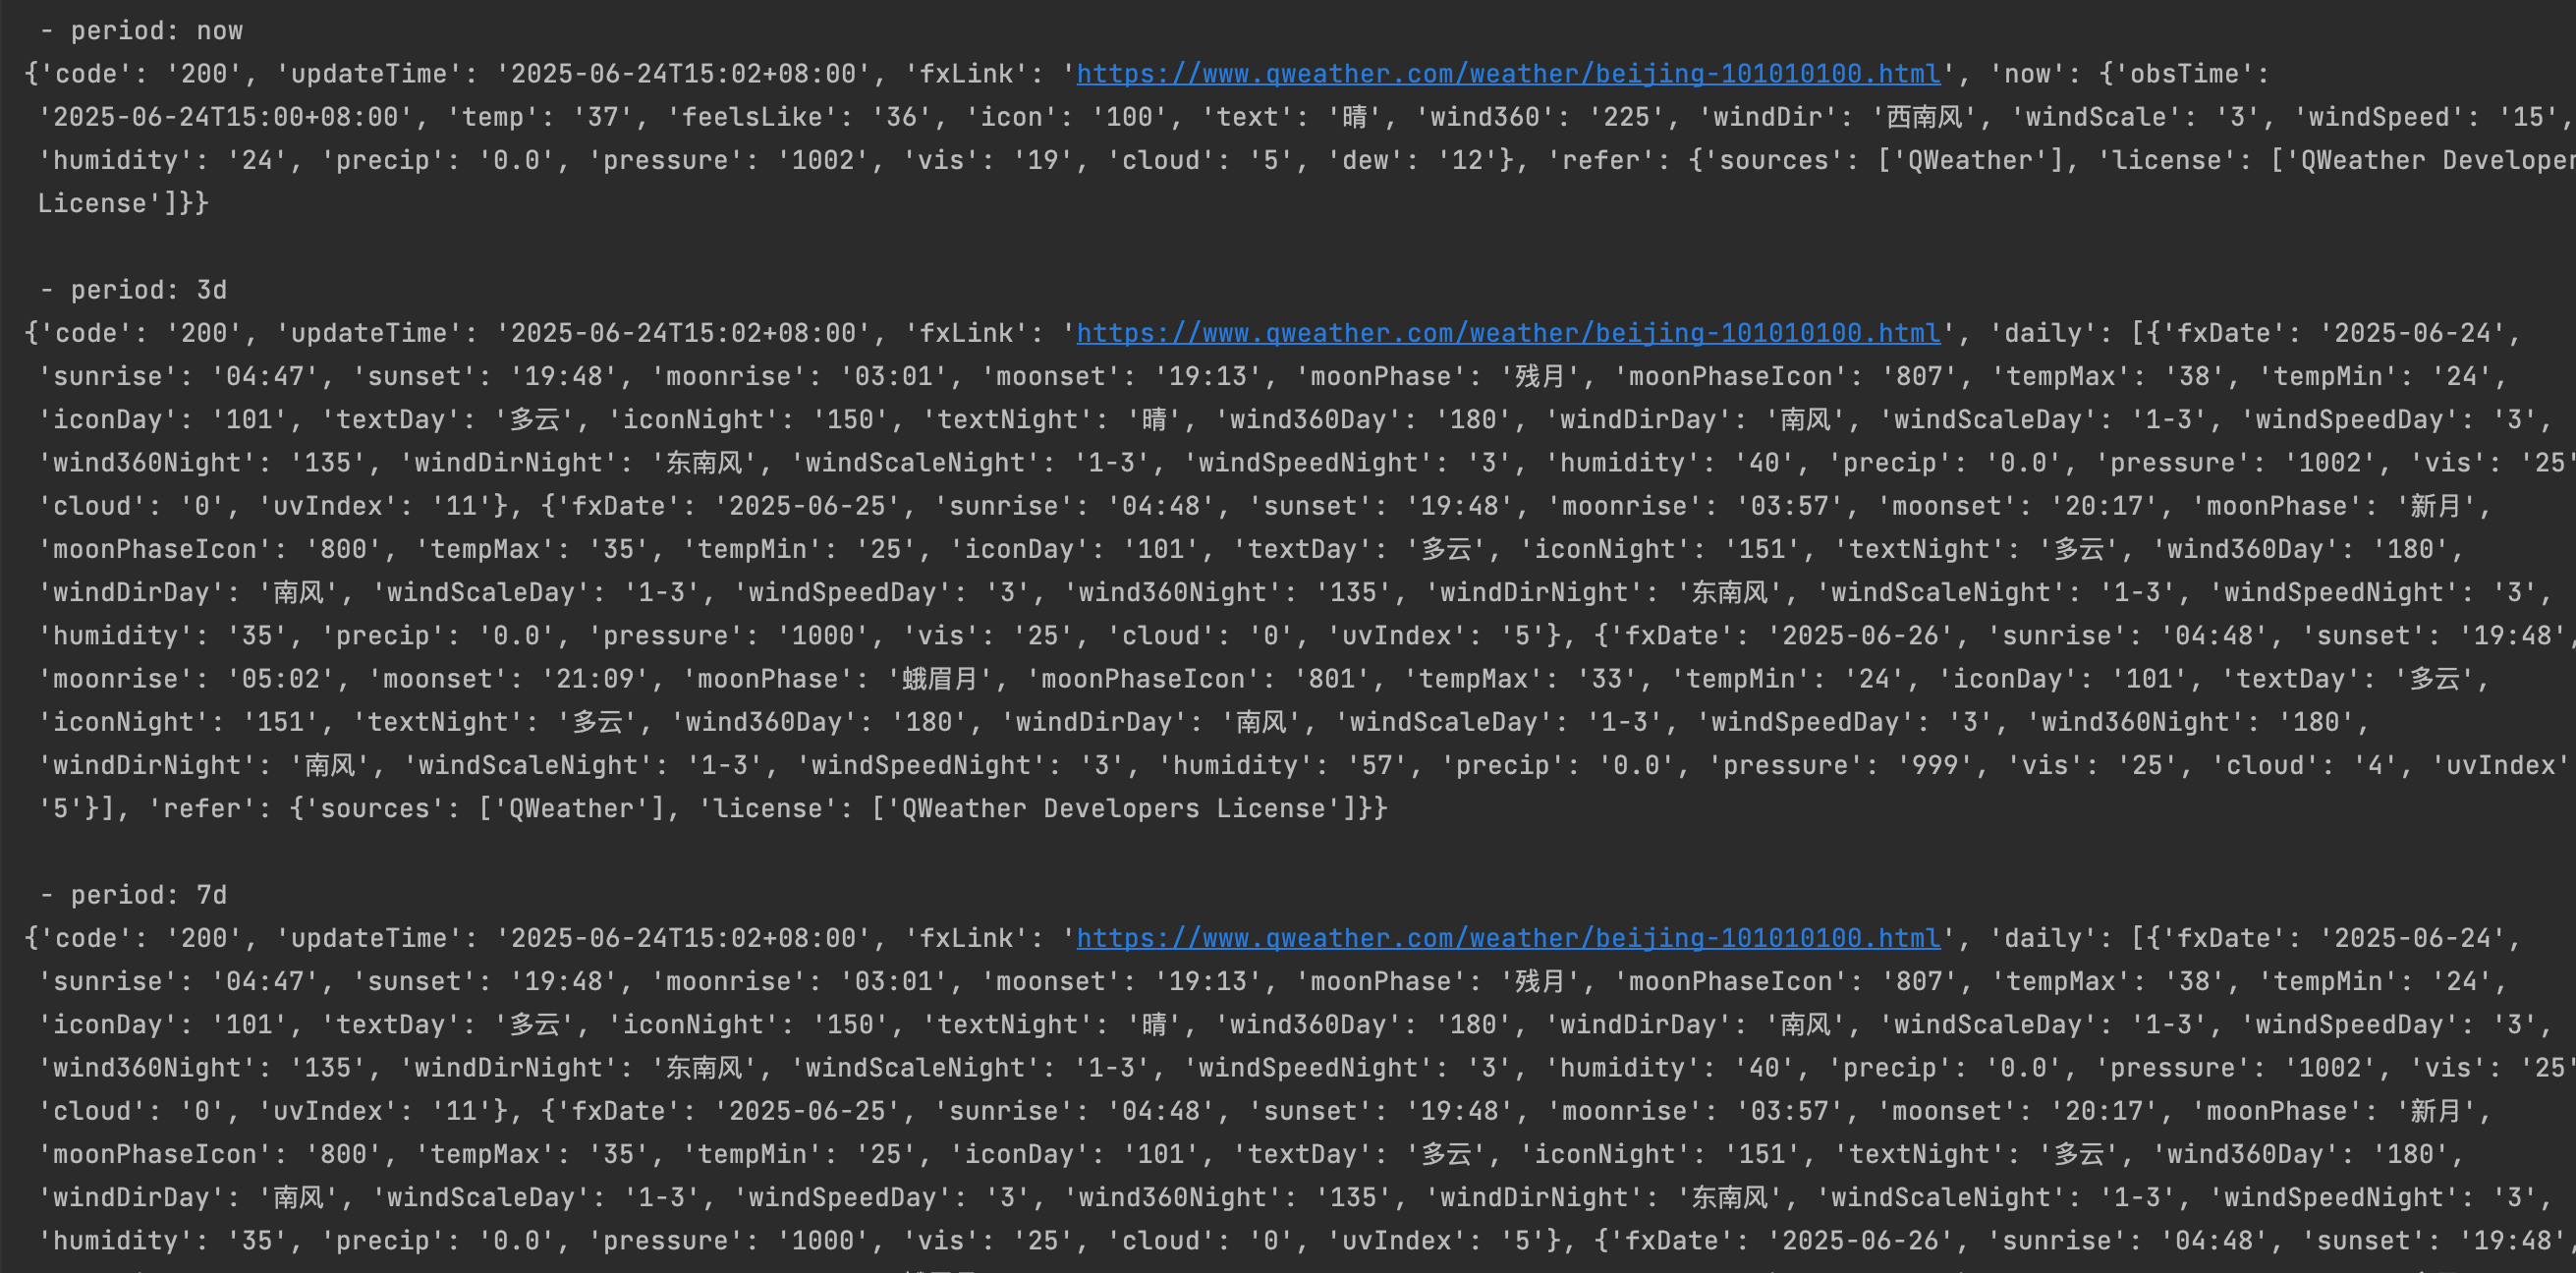
现在依次提取需要的信息。
经过调试最终我得到如下代码:
1
2
3
4
5
6
7
8
9
10
11
12
13
14
15
16
17
18
19
20
21
22
23
24
25
26
27
28
29
30
31
32
33
34
35
36
37
38
39
40
41
42
43
44
45
46
47
48
49
50
51
52
53
54
55
56
57
58
59
60
61
62
63
64
65
66
67
68
69
70
71
72
73
74
75
76
77
78
79
80
81
82
83
84
85
86
87
88
89
90
91
92
93
94
95
96
97
98
99
100
101
102
103
104
105
106
107
108
109
110
111
112
113
114
115
116
117
118
119
120
121
122
123
124
125
126
127
128
129
130
131
132
133
134
135
136
137
138
139
140
141
142
143
144
145
146
147
148
149
150
151
152
153
154
155
156
157
158
159
160
161
162
163
164
165
166
167
168
169
170
171
172
173
174
175
176
177
178
179
180
181
182
183
184
185
186
187
188
189
190
191
192
193
194
195
196
# 博客地址: https://kirsten-1.github.io/
# 创建者: kirsten-1
# 时间: 2025/6/24 15:09
import requests
import datetime, time
from dateutil import parser
from datetime import datetime
# 需要填写这2个参数
API_host = "nv6r6x3txk.re.qweatherapi.com"
api_key = "9544100b5f4f436db7da5d3b027a5f9a"
class QWEATHER:
_geo_api = "https://" + API_host + "/v2/"
_weather_api = "https://" + API_host + "/v7/"
_weather_api_free = "https://" + API_host + "/v7/"
def __init__(self, api_key):
self.API_KEY = api_key
def search(self, service="city", action="lookup", location="北京", coordinate="116.39,39.91", type="scenic",
range="cn"):
api_type = f"{service}/{action}"
api_params_map = {
"city/lookup": {"location": location},
"city/top": {"range": range},
"poi/lookup": {"location": location, "type": type},
"poi/range": {"location": coordinate, "type": type}
}
if api_type not in api_params_map:
print("跳过不支持的 API 类型", api_type)
return None
# 从 api_params_map 中获取对应参数
params = api_params_map[api_type]
url = f"{self._geo_api}{api_type}"
response = self.http_request_v2(url, method="GET", headers=self.headers(), params=params)
return response
def weather(self, service="weather", period="now", locationid=None, coordinate="116.39,39.91", type=None,
date=None):
url = f"{self._weather_api_free}{service}/{period}"
if service in ["historical"]:
url = f"{self._weather_api}{service}/{period}"
params = {"location": locationid if locationid else coordinate}
if type:
params['type'] = type
if date:
params['date'] = date
response = self.http_request_v2(url, method="GET", headers=self.headers(), params=params)
return response
# 生成 headers 头
def headers(self, params=None):
headers = {
'Content-Type': 'application/json',
'X-QW-Api-Key': f'{self.API_KEY}'
}
return headers
def http_request_v2(self, url, method="GET", headers={}, params=None, max_retries=2, timeout=3):
headers = headers or {
'User-Agent': 'Mozilla/5.0 (Windows NT 6.1; WOW64) AppleWebKit/537.36 (KHTML, like Gecko) Chrome/39.0.2171.71 Safari/537.36'}
headers.update(self.headers())
for attempts in range(1, max_retries + 1):
try:
if method == "GET":
response = requests.get(url, headers=headers, params=params, timeout=timeout)
elif method in ("POST", "DELETE"):
response = requests.request(method, url, json=params, headers=headers, timeout=timeout)
response.raise_for_status()
return response.json()
except Exception as e:
print([datetime.datetime.now().strftime('%Y-%m-%d %H:%M:%S'), attempts, url, method, params, headers,
repr(e)])
time.sleep(timeout * attempts)
return None
def get_weekday_from_iso(iso_time_str):
"""
从 ISO 8601 格式或 YYYY-MM-DD 格式的日期字符串获取中文星期几。
参数:
iso_time_str (str): 日期字符串,例如 '2025-06-24' 或 '2025-06-24T15:13+08:00'
返回:
str: 中文星期几,例如 '星期二'
异常:
ValueError: 如果输入的字符串格式不正确
"""
try:
# 尝试解析输入字符串(支持 YYYY-MM-DD 和 ISO 8601 格式)
dt = parser.parse(iso_time_str)
# 获取星期几(0=星期一,1=星期二,...,6=星期日)
weekday_num = dt.weekday()
# 映射到中文星期名称
weekdays = ['星期一', '星期二', '星期三', '星期四', '星期五', '星期六', '星期日']
return weekdays[weekday_num]
except ValueError as e:
raise ValueError(f"无效的日期格式: {iso_time_str}, 必须为 YYYY-MM-DD 或 ISO 8601 格式, 错误: {str(e)}")
def get_time_from_iso(iso_time_str):
"""
从 ISO 8601 格式的日期时间字符串提取 T 之后的时间(HH:MM)。
参数:
iso_time_str (str): ISO 8601 格式的日期时间字符串,例如 '2025-06-24T16:00+08:00'
返回:
str: 时间字符串,例如 '16:00'
异常:
ValueError: 如果输入的字符串格式不正确
"""
try:
# 解析 ISO 8601 格式的日期时间
dt = parser.parse(iso_time_str)
# 提取时间(HH:MM 格式)
return dt.strftime("%H:%M")
except ValueError as e:
raise ValueError(f"无效的 ISO 8601 日期时间格式: {iso_time_str}, 错误: {str(e)}")
def get_short_date(date_str):
"""
从 YYYY-MM-DD 格式的日期字符串提取 MM/DD 格式。
参数:
date_str (str): 日期字符串,例如 '2025-06-24'
返回:
str: 日期字符串,例如 '6/24'
异常:
ValueError: 如果输入的字符串格式不正确
"""
try:
# 解析 YYYY-MM-DD 格式的日期
dt = datetime.strptime(date_str, "%Y-%m-%d")
# 格式化为 MM/DD(无前导零)
return dt.strftime("%-m/%-d") # Unix/Linux
# return dt.strftime("%#m/%#d") # Windows
except ValueError as e:
raise ValueError(f"无效的日期格式: {date_str}, 必须为 YYYY-MM-DD, 错误: {str(e)}")
if __name__ == '__main__':
# 使用示例
client = QWEATHER(api_key)
# 得到今天、24小时、一周的天气:
today_weather = client.weather(period="now", locationid='101010100')
h24_weather = client.weather(period="24h", locationid='101010100')
week_weather = client.weather(period="7d", locationid='101010100')
# updateTime参数
today_time = today_weather["updateTime"]
# 转换成星期几
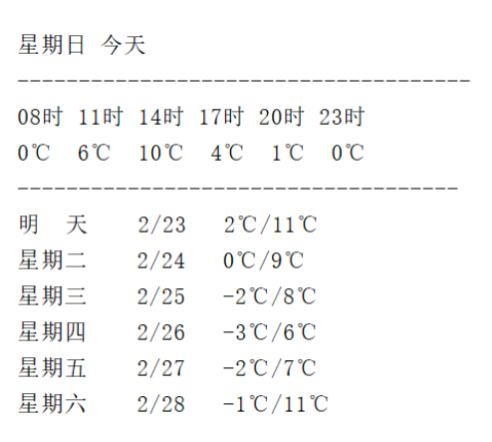
print(get_weekday_from_iso(today_time), "今天 北京")
print("------------------------------------------")
hourly = h24_weather["hourly"]
time = ""
i = 0
temp = ""
for item in hourly:
if i < 6: # 只显示前6项
time += get_time_from_iso(item["fxTime"])
time += "\t"
temp += item["temp"]
temp += "°C\t"
i += 1
print(time)
print(temp)
print("------------------------------------------")
daily = week_weather["daily"]
i = 0
for day in daily:
if i == 1:
print("明天\t\t", get_short_date(day["fxDate"]), "\t", day["tempMin"], "°C/", day["tempMax"], "°C")
elif i > 1:
print(get_weekday_from_iso(day["fxDate"]), "\t", get_short_date(day["fxDate"]), "\t", day["tempMin"], "°C/", day["tempMax"], "°C")
i += 1
最终效果:
任务3:机票购买界面
最终效果是
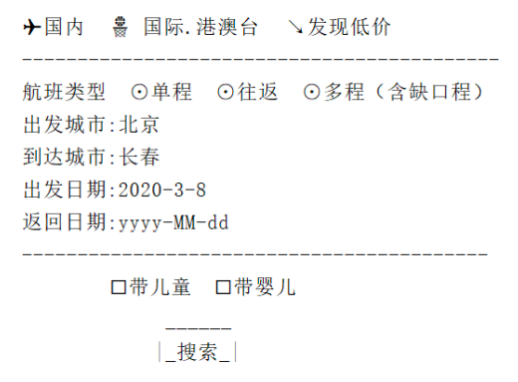
这个特殊符号就不打印了。也不爬取任何信息了。就单纯打印。
1
2
3
4
5
6
7
8
9
10
11
12
13
14
15
16
17
18
19
20
21
22
23
24
25
26
27
28
29
30
31
32
33
# 博客地址: https://kirsten-1.github.io/
# 创建者: kirsten-1
# 时间: 2025/6/24  15:52

from datetime import datetime, timedelta


def add_days_to_date(days=5):
    """
    获取当前日期并加上指定天数,返回格式为 YYYY-MM-DD 的字符串。

    参数:
        days (int): 要添加的天数,默认 5 天

    返回:
        str: 格式化后的日期字符串,例如 '2025-06-29'
    """
    current_date = datetime.now()
    future_date = current_date + timedelta(days=days)
    return future_date.strftime('%Y-%m-%d')


print("国内  国际·港澳台 发现低价")
print("----------------------------")
print("航班类型  ·单程 ·往返 ·多程(含缺口程)")
print("出发城市:北京")
print("到达城市:长春")
print(f"出发日期:{datetime.now().strftime('%Y-%m-%d')}")
print(f"返回日期:{add_days_to_date(10)}")
print("----------------------------")
print("\t·带儿童  ·带婴儿")
print("\t\t[搜索]")
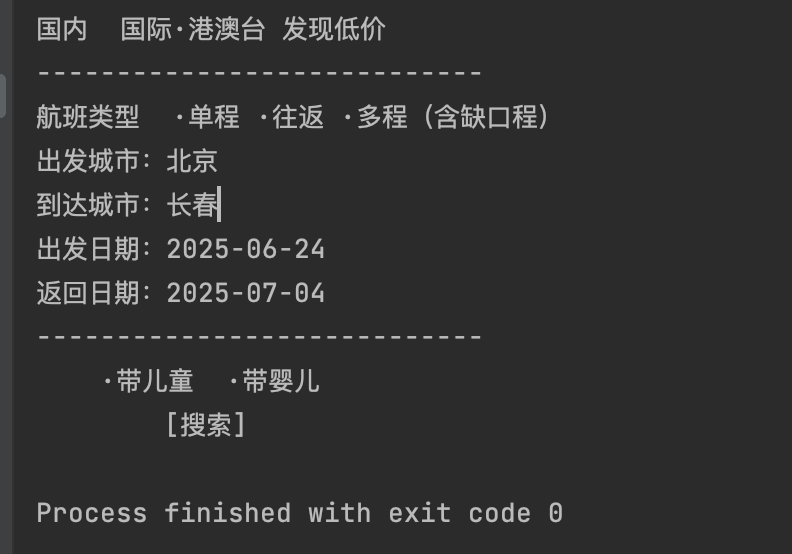
最终效果:
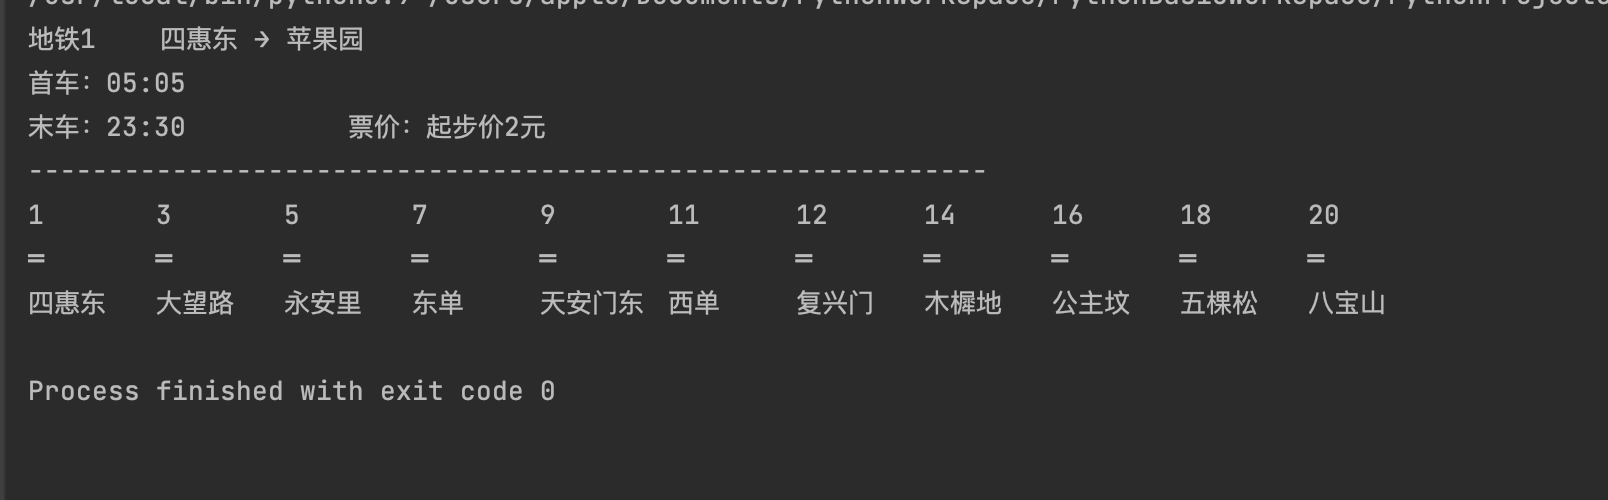
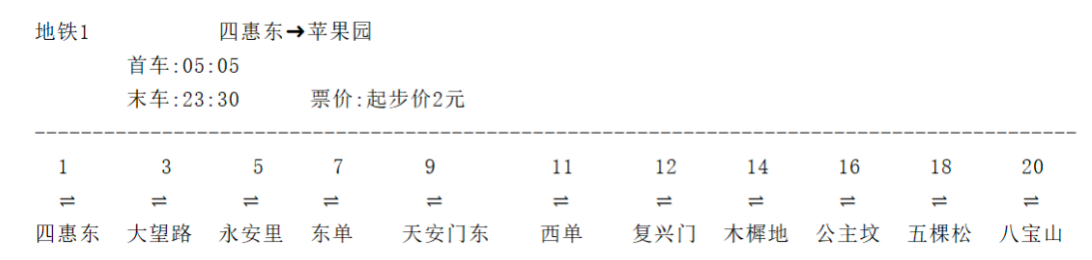
任务4:北京地铁1号线运行图
1
2
3
4
5
6
7
8
9
10
11
12
13
14
15
16
17
18
19
20
21
22
23
24
25
26
27
28
29
30
31
32
33
34
35
36
37
38
def print_subway_info_only_tabs():
    # 顶部信息
    line_info = "地铁1    四惠东 → 苹果园"
    print(line_info)

    first_train = "首车:05:05"
    last_train_time = "末车:23:30"
    fare_info = "票价:起步价2元"

    # 首车信息
    print(first_train)

    # 末车和票价信息,使用多个 \t 来尝试将其推向右侧
    # 这里 \t 的数量需要你根据实际运行效果手动调整,以尽量让“票价”靠右
    # 如果 \t 数量不够,票价会太靠左;如果过多,票价会被推到下一行或太远
    print(f"{last_train_time}\t\t\t{fare_info}") # <-- 这里的 \t 数量是关键微调点

    # 分隔线
    # 长度无法精确控制,因为 \t 的宽度不确定,这里给一个大致长度
    print("-" * 60) # <-- 这个长度可能需要根据你终端的视觉效果调整

    # 站台信息数据
    station_numbers = ["1", "3", "5", "7", "9", "11", "12", "14", "16", "18", "20"]
    indicators = ["═"] * len(station_numbers)
    station_names = [
        "四惠东", "大望路", "永安里", "东单  ", "天安门东",
        "西单  ", "复兴门", "木樨地", "公主坟", "五棵松", "八宝山"
    ]

    # 使用 \t.join() 来连接每一列的元素
    # 这将使每个元素后都跟着一个制表符,从而尝试对齐到制表位
    # 注意:由于字符长度不一,制表符后的空白长度会变化,导致列无法垂直对齐
    print("\t\t".join(station_numbers))
    print("\t\t".join(indicators))
    print("\t".join(station_names))

# 调用函数打印
print_subway_info_only_tabs()